
Hosted Payment Page (HPP)
This section describes how to accept payments using hosted payment pages in order to keep your servers out of scope for PCI. The payment form will be created in an iFrame or new page that will be loaded from our API. The page will then be submitted and the user can be redirected back to your hosted page.
Basic Setup
Here is an overview of the steps involved in getting the hosted payment page setup. These are basic steps to create a static payment page for accepting payments.
- Log in to the User Interface.
- Navigate to the Location settings and then click on Hosted Payment Page.
- This section will allow you to add a Hosted Payment Page setup for your desired payment service.
- Select the template you wish to use and then click “Create Hosted Payment Page”
- Customize the new Hosted Payment Page to meet your needs.
- Click the “save” button in the upper right hand corner.
- Click the “use” button in the upper right hand corner.
- Copy the button text to your web site and place it where you would like someone to be able to make a payment.
The base setup will work for situations that require static content. If the transaction amount is fixed, the above will work nicely. The above setup will also work well for a donation type Hosted Payment Page where the end customer will be able to supply their own dollar amount.
If your Hosted Payment Page requires a different transaction amount for each payment, and the end customer is not allowed to alter the transaction amount, then you will need to use a slightly more advanced setup. This method is outlined in the next section.
Advanced Setup
Hosted Payment Pages can also accommodate a more complex and dynamic setup. For example, you may need to pass in a different transaction amount and description with each customer payment (checkout). You may require that these values cannot be changed by the end customer. The following steps outline how to setup and send this dynamic content to a Hosted Payment Page.
At times, it may be necessary to pass custom data to the Hosted Payment Page. Say you want to create a payment page that allows a custom transaction amount and description to be passed to the Hosted Payment Page. In order to set this up, perform the following steps:
- Log in to the User Interface.
- Navigate to the Location settings and then click on Hosted Payment Page.
- Select the template you wish to use and then click “Create Hosted Payment Page”
- Find the transaction amount input.
- Click the gear to edit the field.
- Change the read only to true.
- A Default Value is Required for fields that are Required and Read Only. Set to "0". This value can still be overridden with custom data.
- Click the Save button
Custom Fields
You may desire to set the property name on a Transaction where your custom data is stored. To modify follow these steps:
- Log in to the User Interface.
- Navigate to the Location settings and then click on Hosted Payment Page.
- Select an existing template or create a new one by clicking “Create Hosted Payment Page”
- Find an existing custom field or add a new one to the template
- Click the gear to edit the field.
- Find the input for "Shortname", where you will see a box with text "custom_data-" followed by an input with current custom data property.
- Valid values are alphanumeric characters and underscores.
- Click the Save button
Note: This field is utilized for future transactions. If it is changed, the transactions that are ran will include the shortname. Prior transactions will not have it available.
Passing Custom Data to HPP
Now that you have a template setup for allowing dynamic data, you have to prepare your data to be passed in.
Note: All data that is passed in to the Hosted Payment Page needs to be encrypted using the HPP Encryption Key. See Data Encryption below.
The data must be in JSON format and must contain, at a minimum, the id of the Hosted Payment Page. You may have noticed that when you click the “use” button for your Hosted Payment Page, you are present with a URL that has a data element to it. The data element in the URL is the base JSON for your Hosted Payment Page. It contains a base amount of JSON data like so:
{
    "id": "xxxxxxxxxxxxxxxxxxxxxxxx"
}
Custom Fields
You may desire to set the property name for a custom field so your custom data is stored on a Transaction where you can consistently expect it to be located. To modify follow these steps:
- Log in to the User Interface.
- Navigate to the Location settings and then click on Hosted Payment Page.
- Select an existing template or create a new one by clicking “Create Hosted Payment Page”
- Find an existing custom field or add a new one to the template
- Click the gear to edit the field.
- Find the input for "Shortname", where you will see a box with text "custom_data-" followed by an input with current custom data property.
- Valid values are alphanumeric characters and underscores.
- Click the Save button
Note: This field is utilized for future transactions. If it is changed, the transactions that are ran will include the shortname. Prior transactions will not have it available.
The above JSON would be the absolute minimum needed to send in the encrypted data string. This is the base string the is provided in the User Interface that can be used for the Hosted Payment Page requests.
Field Settings
Say for example that you need to override the transaction_amount field to set a fixed amount that cannot be changed by the end customer, you could do this by altering the field configuration like below:
{
    "id": "xxxxxxxxxxxxxxxxxxxxxxxx",
    "field_configuration": {
        "body": {
            "fields": [
                {
                    "id": "transaction_amount",
                    "value": "10.00",
                    "label": "Amount",
                    "readonly": true,
                    "visible": true
                }
            ]
        }
    }
}
Looking at field_configuration.body.fields you can see that an override has been provided for the "transaction_amount" field. Here we are overriding the "value", "label", "readonly", and "visible" settings for that field. The table below explains how each of these fields can be used to modify the appearance and/or functionality of a particular field.
| Field | Description |
|---|---|
| value | Used to change the default value of the field on the page |
| label | Used to change the text label that appears next to the corresponding input |
| readonly | If set to true, will prevent a user from modifying the field on the page |
| visible | If set to false, will hide the input and label for this field |
Important:
- Only fields that already exist on the form can be manipulated with this method. New fields cannot be added with this method.
- You cannot override the "value" for account_number, exp_date, cvv, and account_holder_name fields.
Form Settings
The following fields can be used to control the behavior of the Hosted Payment Page. These values can be configured under Form Settings when editing a Hosted Payment Page in the UI. They can also be provided in data during the API request for the HPP:
| Field Name | Type | Max Length | Description |
|---|---|---|---|
| redirect_url_on_approve | string | 256 | The page a user will get redirected to upon approval of transaction. |
| redirect_url_on_decline | string | 256 | The page a user will get redirected to upon decline of transaction. |
| redirect_url_delay | integer | The amount of time in seconds to wait before redirecting to either redirect_url_on_approve or redirect_url_on_decline. | |
| max_payment_amount | string | The maximum amount a Payee would be able to enter on the form. | |
| min_payment_amount | string | The minumum amount a Payee would be able to enter on the form. | |
| parent_send_message | boolean | When set to 1, this will allow for the JSON response from the form submission to be posted back to the parent window containing the iframe. For more info see Using postMessage. | |
| stylesheet_url | string | 256 | API loads the default one, can be overridden with the file that is sent in the data. Should be full url, ie. https://example.com/stylsheet.css |
This JSON example below demonstrates how to include multiple Form Settings:
{
    "id": "11e8052891d6420cb7a5ca18",
    "field_configuration": {...}, // Field Settings
    // Form Settings below here
    "redirect_url_on_approve": "{full URL}",
    "min_payment_amount": "10",
    "max_payment_amount": "20"
}
Overriding Default Styles
WIthin the Form Settings described above you will notice there is a stylesheet_url. This field can be used to include your own stylesheet to override the default styles already included on the page. You can use the following link to download the latest default CSS for HPP as a starting point for your custom stylesheet:
Once you have prepared your custom CSS and made it available on a public URL you can include it in your HPP request as illustrated below:
{
    "id": "11e8052891d6420cb7a5ca18",
    "field_configuration": {...}, // Field Settings
    // Form Settings below here
    "redirect_url_on_approve": "{full URL}",
    "min_payment_amount": "10",
    "max_payment_amount": "20",
    // Use this following Form Setting to provide your own stylesheet
    "stylesheet_url": "{full URL - i.e. https://third.party.domain/css/styles.css}"
}
Transaction Fields
In addition to being able to override fields that are already present on the form, you can also pass in any other field that can normally be provided on the transactions endpoint, so long as:
- the value for visible is false.
or - the field has been added to the form through the UI.
If visible is set to false, you can provide any transaction field and it won’t be rejected, provided it has an appropriate value assigned to it (as per the requirements on the Transactions Endpoint).
If visible is set to true, and the field is not added to the form through the UI, the field provided in the data parameter will NOT be accepted.
In the example below you can see some of these additional fields being provided with a mix of visibility values:
{
    "id": "xxxxxxxxxxxxxxxxxxxxxxxx",
    "field_configuration": {
        "body": {
            "fields": [
                {
                    "id": "description",
                    "value": "Sneakers - Womans, blue",
                    "label": "Product Description",
                    "readonly": true,
                    "visible": true  // Requires field to be added to form in UI
                },
                {
                    "id": "order_num",
                    "value": "1234567890",
                    "label": "",
                    "readonly": true,
                    "visible": false
                },
                {
                    "id": "phone_number",
                    "value": "",
                    "label": "Telephone",
                    "readonly": false,
                    "visible": true // Requires field to be added to form in UI
                }
            ]
        }
    }
}
Storing Accounts
As mentioned in the above section, extra fields can be passed into the HPP page to be sent with the transaction. Let's say that on some transactions, the account number needs to be stored for the customer. Provided that a contact account was previously created, you can pass the contact_id along with the save_account and save_account_title fields to the HPP page in order to store that account number into the customer's account vault. Here is an example of what this will look like:
{
    "id": "xxxxxxxxxxxxxxxxxxxxxxxx",
    "field_configuration": {
        "body": {
            "fields": [
                {
                    "id": "transaction_amount",
                    "value": "10.00",
                    "label": "Amount",
                    "readonly": true,
                    "visible": true
                },
                {
                    "id": "contact_id", //"contact_api_id" can be used here instead
                    "value": "xxxxxxxxxxxxxxxxxxxxxxxx",
                    "visible": false
                },
                {
                    "id": "save_account",
                    "value": true,
                    "visible": false
                },
                {
                    "id": "save_account_title",
                    "value": "Primary Card",
                    "visible": false
                }
            ]
        }
    }
}
In the above code, the save_account_title is an optional field that can be used to name the stored account vault. If this field is not passed, the stored account will be save without a title.
Alternate Actions
If there is a requirement to run transactions that are a different action from the default setup for a product/deposit account, then this is possible to do by passing a hidden field in the data to the HPP page. The “action” field can be passed to the HPP page as a hidden field, and this will overwrite the default action setup on the product. For example, to run an HPP transaction that is an “avsonly” action, you can pass in data as follows to overwrite the default action:
{
    "id": "xxxxxxxxxxxxxxxxxxxxxxxx",
    "field_configuration": {
        "body": {
            "fields": [
                {
                    "id": "transaction_amount",
                    "value": "0",
                    "label": "Amount",
                    "readonly": true,
                    "visible": false
                },
                {
                    "id": "action",
                    "value": "avsonly",
                    "visible": false
                }
            ]
        }
    }
}
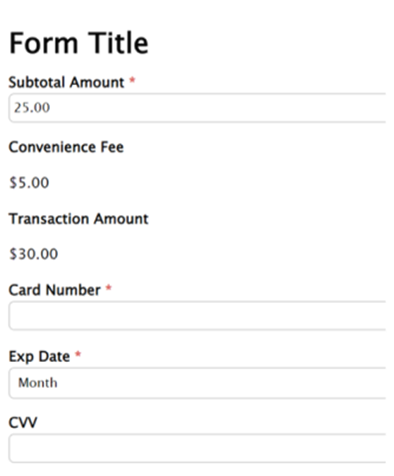
Surcharge/Convenience Fee(s)
You can now add a surcharge or convenience fee to your HPP. Please contact SDK Support (sdksupport@nuvei.com) in order to add the fee service to your sandbox project/location. Once configured, the additional fee will be calculated and displayed within the HPP attached to the service.

Data Encryption
Once you have created the JSON object that defines any Field and/or Form Setting overrides, as well as any Transaction fields, you will need to encrypt the data and add it as a parameter in the URL for the Hosted Payment Page.
Encryption Key
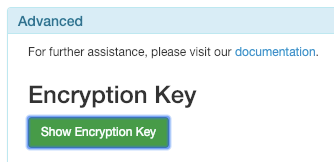
All data that is passed in to the Hosted Payment Page needs to be encrypted using the HPP Encryption Key. This Encryption Key is included in the API Response to successful POST and GET requests to the /v2/hostedpaymentpages endpoint.
This can also be obtained via the UI by viewing a Hosted Payment Page and clicking the Show Encryption Key button within the Advanced > Encryption Key section:
The below sample shows how to encrypt your custom HPP data in Javascript using the CryptoJS library.
Say we have constructed the following JSON for our data parameter:
{
    "id": "11e8052891d6420cb7a5ca18",
    "redirect_url_on_approve": "{full URL}",
    "min_payment_amount": "10",
    "max_payment_amount": "20"
}
We can encrypt this like so:
var CryptoJS = require('crypto-js');

// Your HPP Encryption key
var encryption_key = 'hpp_encryption_key';

// Convert JSON to string
var data = JSON.stringify({
    "id": "11e8052891d6420cb7a5ca18",
    "redirect_url_on_approve": "{full URL}",
    "min_payment_amount": "10",
    "max_payment_amount": "20"
});

// Encrypt the JSON string using encryption_key from above
var encrypted_data = CryptoJS.AES.encrypt(data, encryption_key).toString();

// URL encode the encrypted data so it can be sent in the URL
var encoded_data = encodeURIComponent(encrypted_data);

// Put together the final UR: for displaying in your page
var url = 'https://{{sandbox_url}}/hostedpaymentpage?id={{hosted_payment_page_id}}&data=' + encoded_data;

// Here is the final URL
console.log(url);
<?php

// Your HPP Encryption key
$encryptionKey = 'hpp_encryption_key';

// Convert to JSON string
$data = json_encode([
    'id' => '11e8052891d6420cb7a5ca18',
    'redirect_url_on_approve' => 'https://some.full.url',
    'min_payment_amount' => '10',
    'max_payment_amount' => '20'
]);

$salt = openssl_random_pseudo_bytes(8);
$salted = '';
$dx = '';
while (strlen($salted) < 48) {
    $dx = md5($dx . $encryptionKey . $salt, true);
    $salted .= $dx;
}
$key = substr($salted, 0, 32);
$iv = substr($salted, 32, 16);

// Encrypt the JSON object
$encryptedString = openssl_encrypt($data, 'aes-256-cbc', $key, true, $iv);

$encodedEncryptedString =  urlencode(base64_encode("Salted__" . $salt . $encryptedString));

echo "https://{{sandbox_url}}/hostedpaymentpage?id={{hosted_payment_page_id}}&data=$encodedEncryptedString\n";
Note: The above code is intended to be used on the server side, not client side. Your HPP Encryption Key should not be exposed to the public.
Expands
For details on how to use Expands on an Endpoint, please visit the Expands (Related Records) page.
The following are samples that can be used when using expands (please be sure to change the necessary information to apply to your location):
/v2/hostedpaymentpages/xxxxxxxxxxxx?expand=location
/v2/hostedpaymentpages/xxxxxxxxxxxx?expand=created_user,modified_user
/v2/hostedpaymentpages/xxxxxxxxxxxx?expand=product_transaction